To undelete Mac files free, here is a step-by-step guide to using a free Mac undelete program called Photorec by Christophe GRENIER of CG Security. (Huge thanks to Christophe for making this program and making it free to the world.)
Overview – Undelete Mac Files Free
- Download Mac undelete program – photorec/testdisk
- Unzip program
- Use Terminal program to run photorec
- Select disk and disk partition to find deleted files
- Select file types to find
- Select directory to put recovered files
- Start undelete process & wait
Detailed Steps – Undelete Mac Files Free
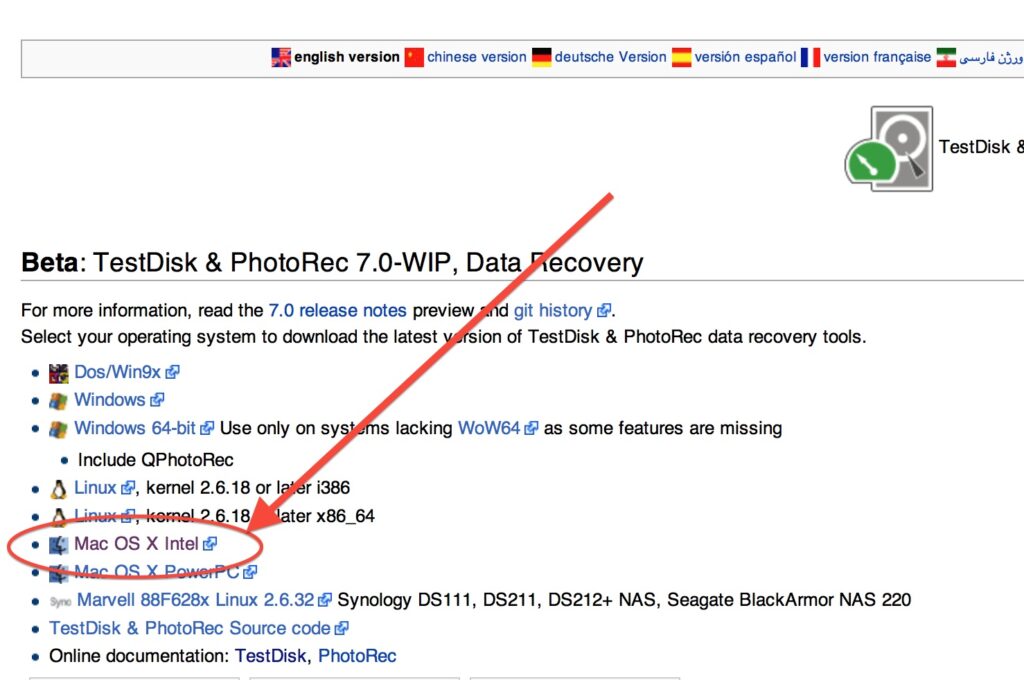
- Download Testdisk / Photorec (both come together in same .bz2 archive file) from http://www.cgsecurity.org/wiki/TestDisk_Download
- The file will be saved in your Downloads folder named testdisk-7.0-WIP.mac_intel.tar.bz2
- You can see it in Finder like in the below image. Double click testdisk-7.0-WIP.mac_intel.tar.bz2 it to unzip. You’ll then see a folder named testdisk-7.0-WIP
- Launch the Terminal program, found in Applications -> Utilities -> Terminal
- Change directory to Downloads by typing “cd Downloads” then press enter/return button . (Capital/Uppercase letters matters in most cases. Follow commands exactly). Change directory to testdisk-7.0-WIP by typing “cd testdisk-7.0-WIP” then press enter/return. Show the contents of the directory by typing “ls” then press enter/return. Each red arrow in image below points to a typed command followed by enter/return button.
- To start the undelete mac files program, type “sudo ./photorec” then press enter/return. At this point you’ll be asked for your password. Type it in and hit enter/return.

- You often need “root” access for photorec to see all partitions on your disk and using “sudo” gives you the power of root access. It is key that you use sudo to run the photorec program which will undelete / recover deleted files from your Mac drives. In some cases this won’t be necessary, but it doesn’t hurt and will ensure you see all of your disk partitions where your deleted files may be stored. In my case, I could not see the partition where my accidentally deleted files were stored as I didn’t use sudo and I nearly gave-up and paid the extortion fees for a paid undelete program. Don’t torture yourself like I did. Without using sudo photorec may return an error of “No disk found”. Then photorec will restart itself using sudo. Enter your password and hit return/Enter to proceed to the home screen.

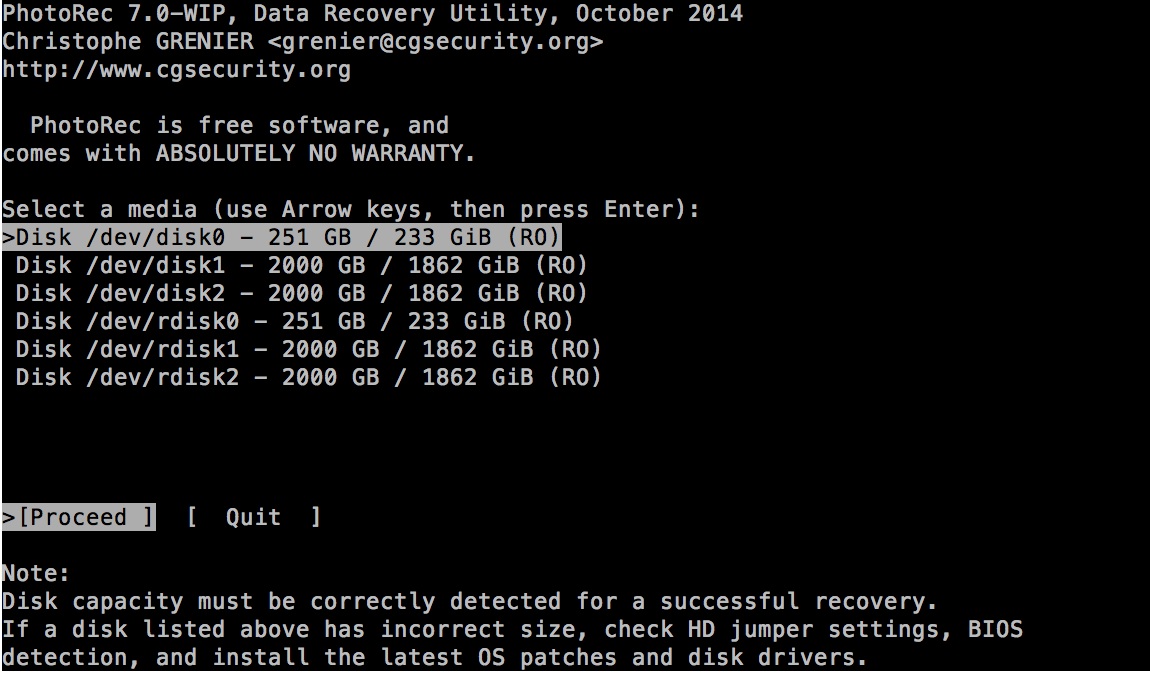
- After launching the photorec program you’ll see the home screen of this free Mac undelete program:
- Below you see 6 disk partitions (just my particular case as I had 2 external disks connected). /dev/disk0, /dev/disk1, /dev/disk2, plus 3 similar with “r”disk. /dev/rdisk disks give “raw” disk access to the same disks listed just above, but are generally faster to use so it’s recommended to use the rdisk access point to your disk.
- You need to select the disk that contains the deleted files you wish to recover. Hopefully the disk size and/or order in the list provides you enough information to select the correct disk.
- You main Mac computer disk will be the first on the list. You can see its size which may help identify it. My Mac is a Macbook Pro from 2012 and I chose the 250GB disk option so I recognize the disk as the first disk in the list which reads: Disk /dev/disk0 – 251GB / 233 GiB (RO). If you want to see what your disk0, disk1, diskX, etc. disks are named, use Disk Utility (Applications -> Utilities -> Disk Utility), then click to highlight your disk of interest (the lines with disk icons that are not indented) and click the circle i button to get info. The first line within info will show the disk name and the third from last line at bottom will show what disk number it is. That disk number corresponds to the disk numbers listed in photorec undelete program, like /dev/disk0, /dev/disk1, etc.

- Use the up/down arrow keys to select & highlight the disk with deleted files to recover
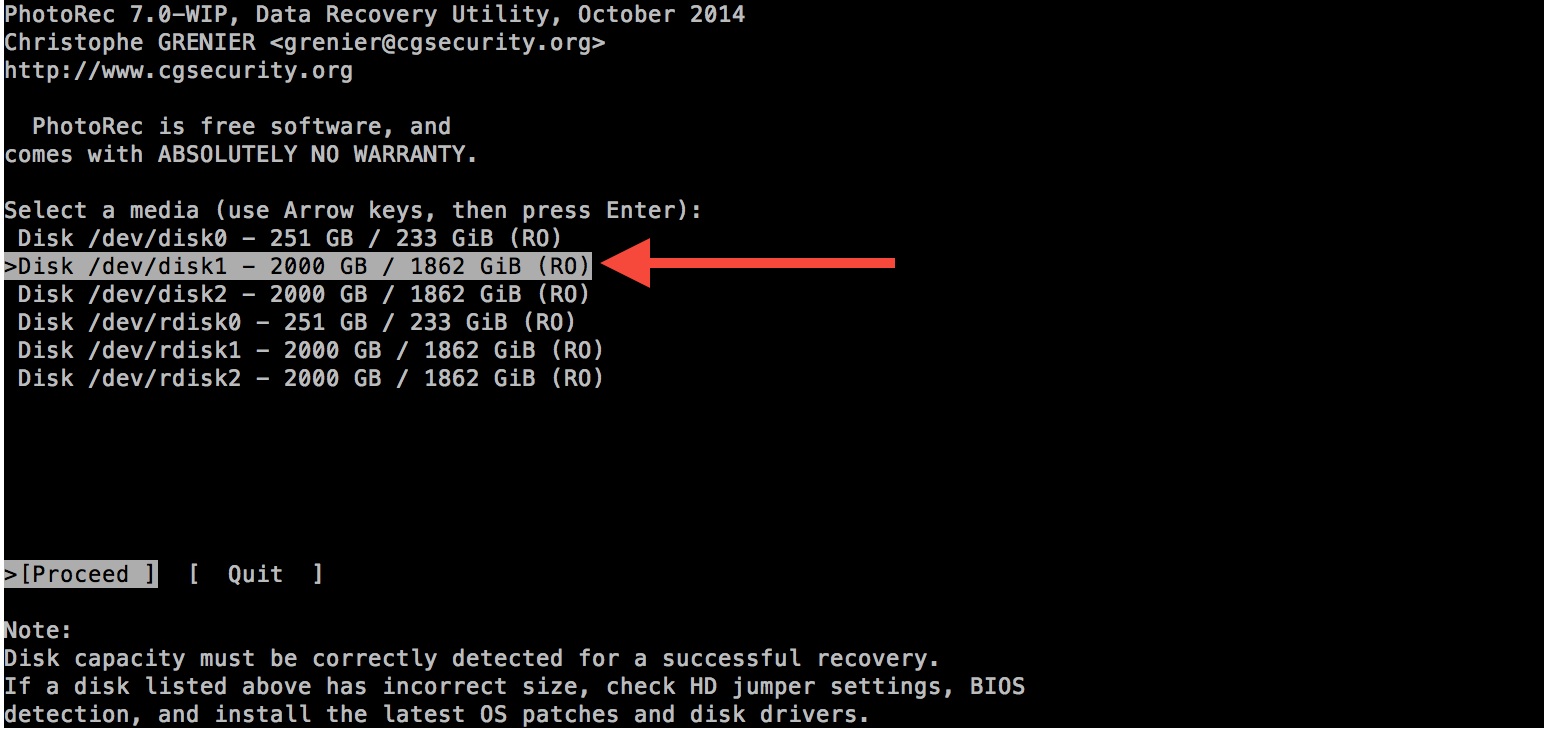
- The number after “/disk” such as “/dev/disk2” is the order in which the disk was plugged or “mounted” on your computer (known as “mounted”), counting from 0 onwards. In my case, it’s the second external disk drive I connected which contains deleted files I want to recover so , I highlight “Disk /dev/disk1 – 2000GB / 1862 GiB (RO)”. Note: I should have used /dev/rdisk1 but I didn’t know that rdisk was raw/faster access to disks at the time. I’d recommend trying the rdisk version first.

- Hit enter/Return to proceed with the highlighted disk.
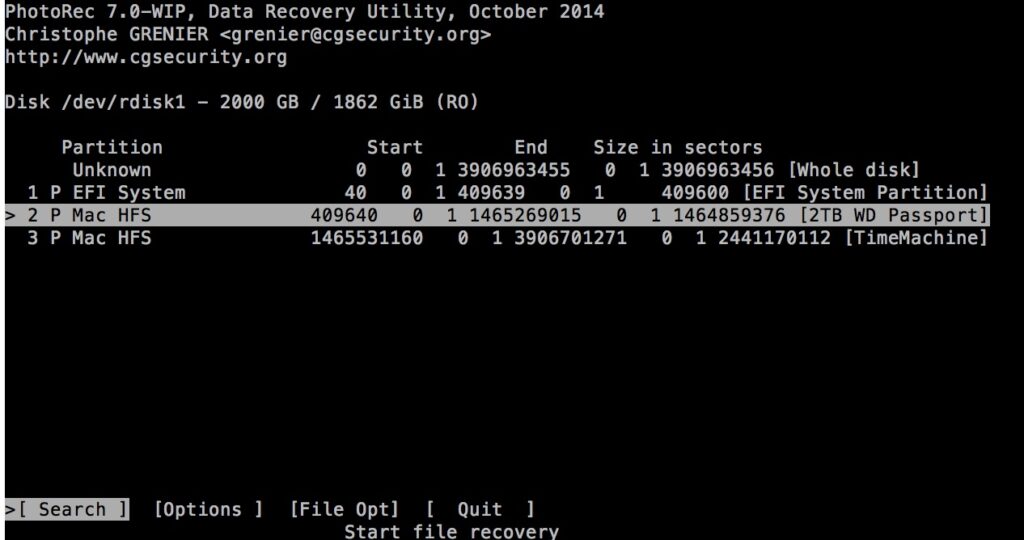
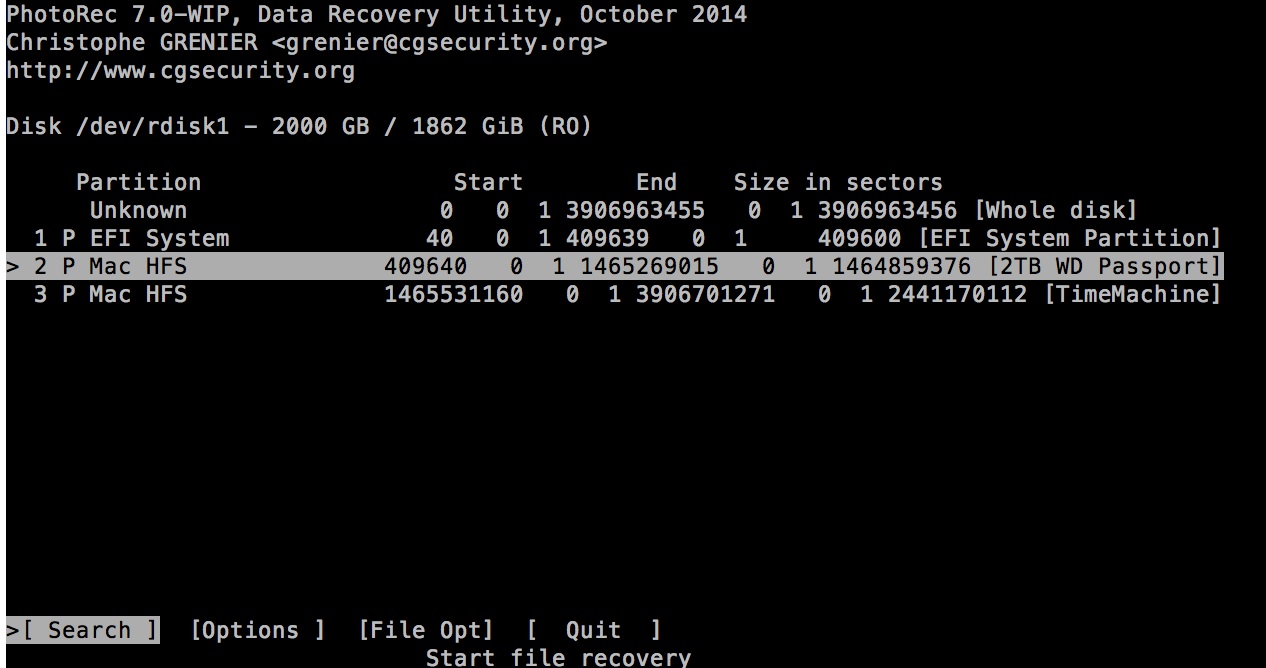
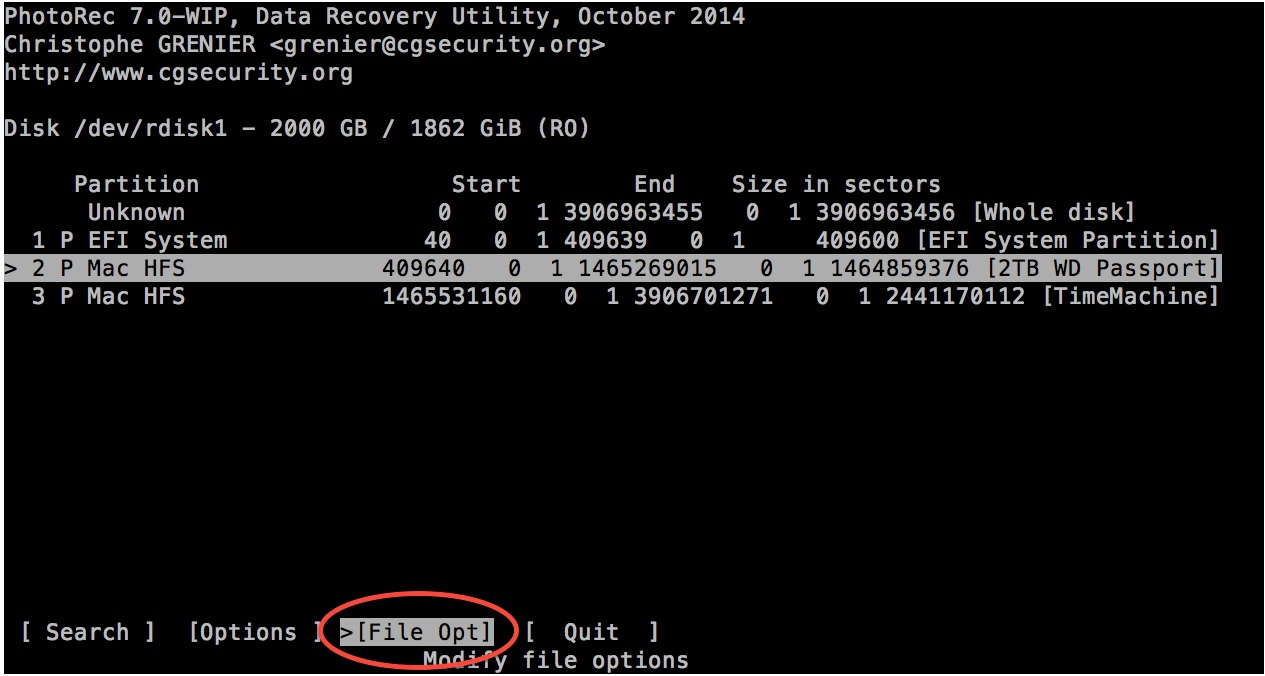
- Next you’ll see the partitions on the disk you selected and need to choose the one with deleted files.
- Three or more partitions may show up. First will be the entire disk (i.e. everything), second will be a system partition and after that, any partitions you happened to create. In my example below you’re looking at an external drive split into 2 partitions, one named “2TB WD Passport” and another “TimeMachine”. I want to undelete files from a partition I named “2TB WD Passport”, which is where I knew I accidentally deleted my files from. So using the up/down arrow keys I highlight the interesting partition.
- Using the right arrow key, move the bottom command highlight from [Search] to [File Opt] which is where you will choose the deleted file type(s) to search and recover/undelete files from my Mac.
- Press the enter/return key on your keyboard to go to File Options screen, which looks like the following:

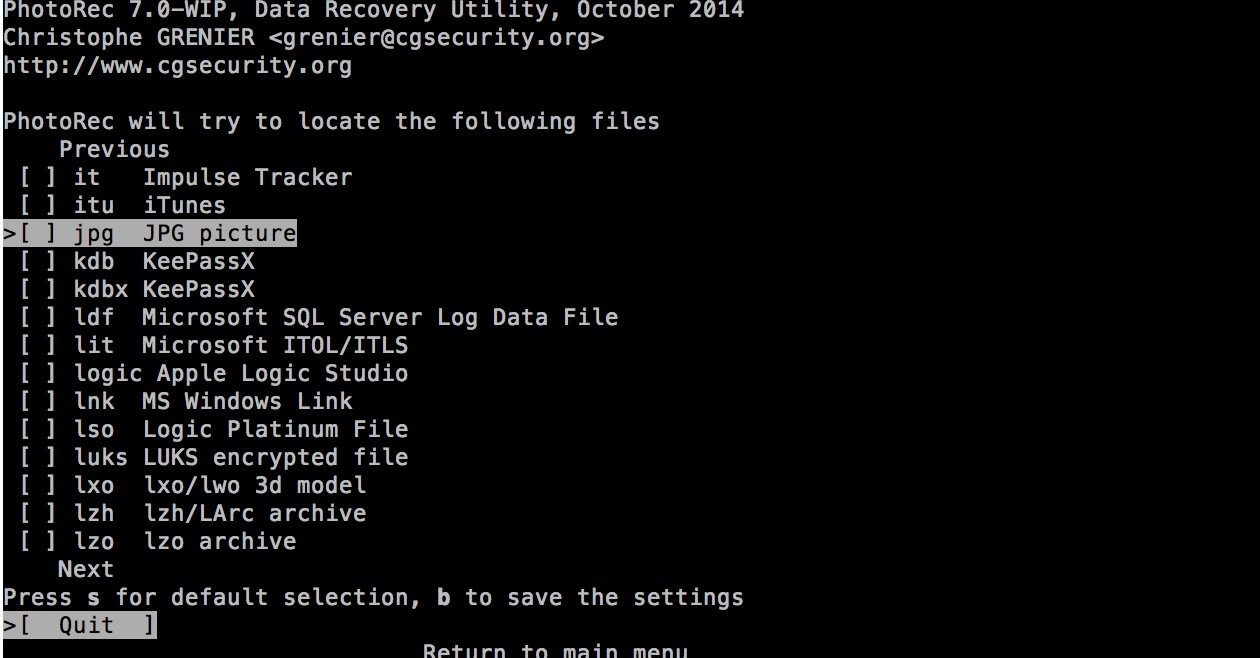
- By default, all file types are selected.
- Select only the file type(s) you want to undelete. This makes the file search & recovery process on your Mac much faster.
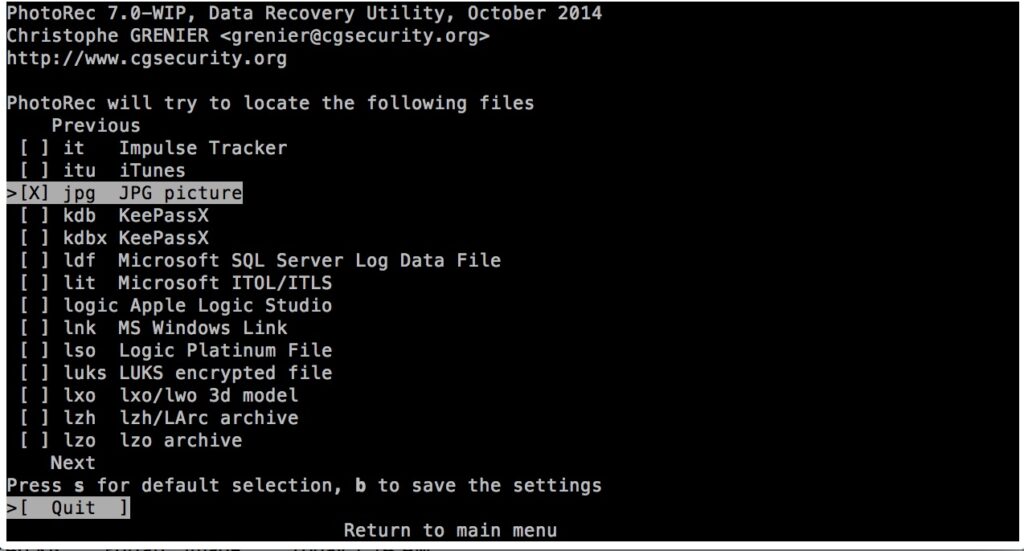
- In the File Opt screen, press “s” to unselect all the file types.

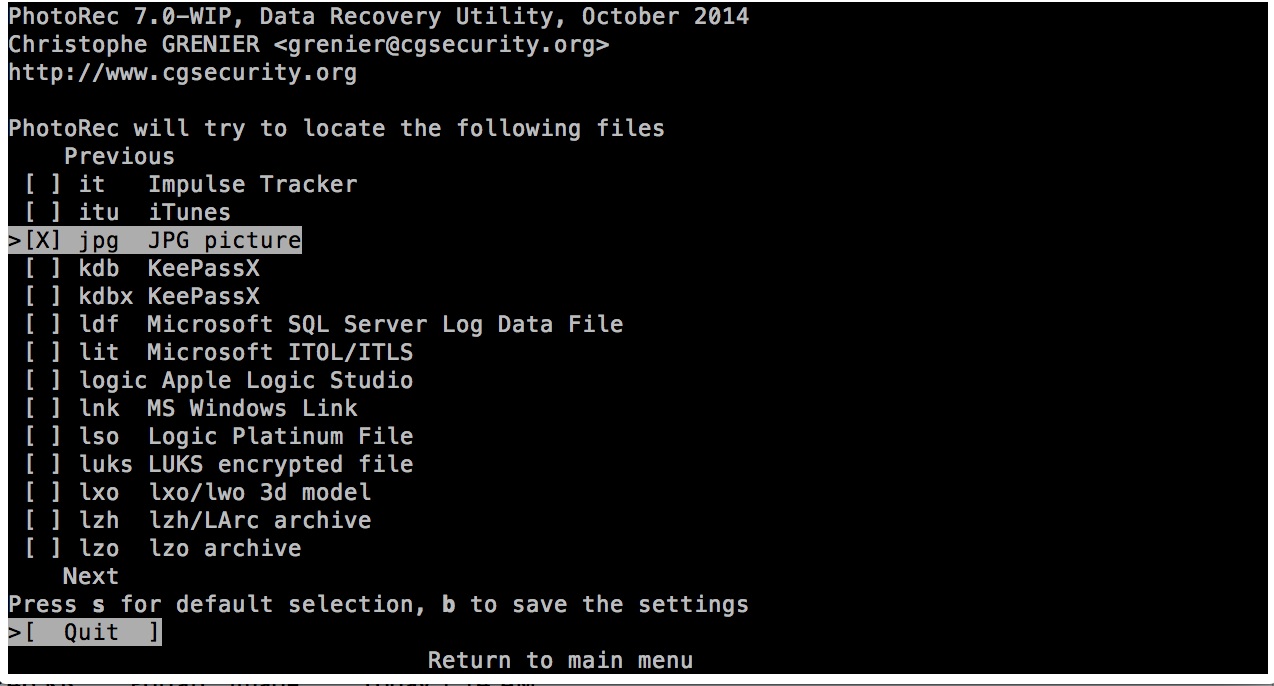
- Then use the keyboard up/down arrow keys to move the highlight bar to the file type you want to recover. Press the x key or spacebar on your keyboard to mark that file type for search & recovery. Repeat for as many file types as you want. (Example below shows only jpg files selected for recovery). photorec will then search only for deleted files of the type(s) you have selected to undelete/recover. Huge note: some file types are grouped under a file category and may be difficult to see. For example, MP4 files are under the .mov file category. Scan this list carefully for the file type(s) you are looking to undelete.
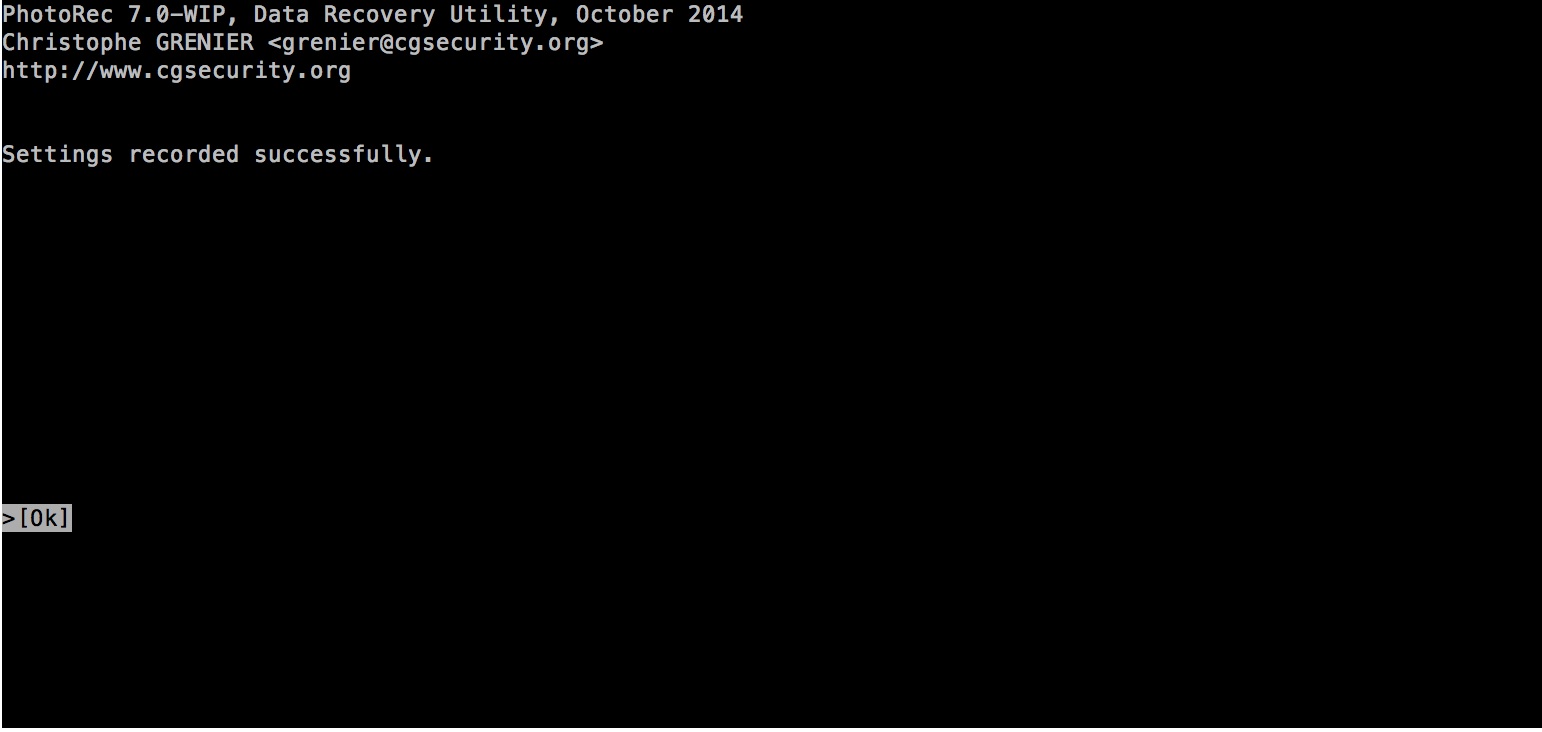
- When you’ve marked all file types you’re interested in recovering from deleted state, press the “b” key on your keyboard to save the file type list to search for. You will see a confirmation screen as below. Press enter/return to go back to the main screen.
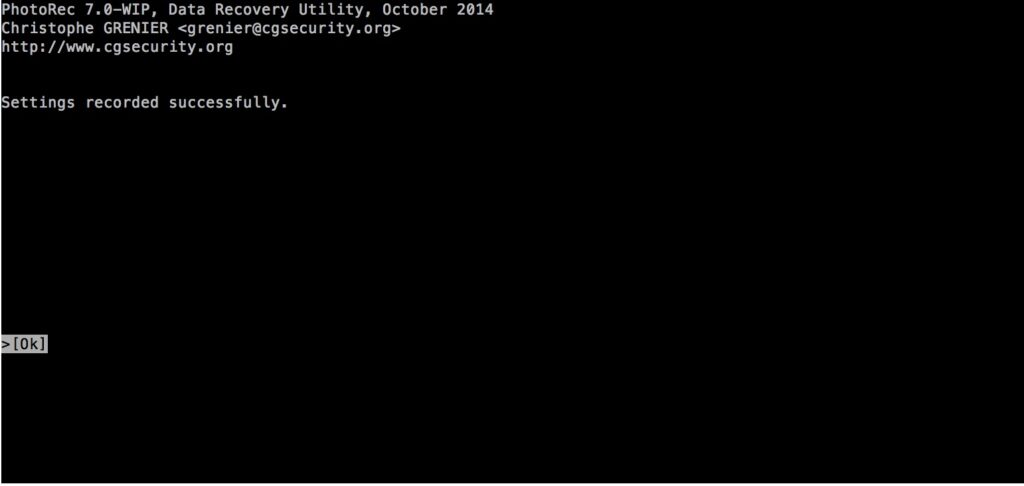
- Then press enter / return to return to the file selection screen. Press enter / return to Quit and return to the home/search screen.
- Now you are ready to Search. Using the left arrow key, move the command highlight bar at the bottom of the screen to “Search” and press enter / return on your keyboard to continue.
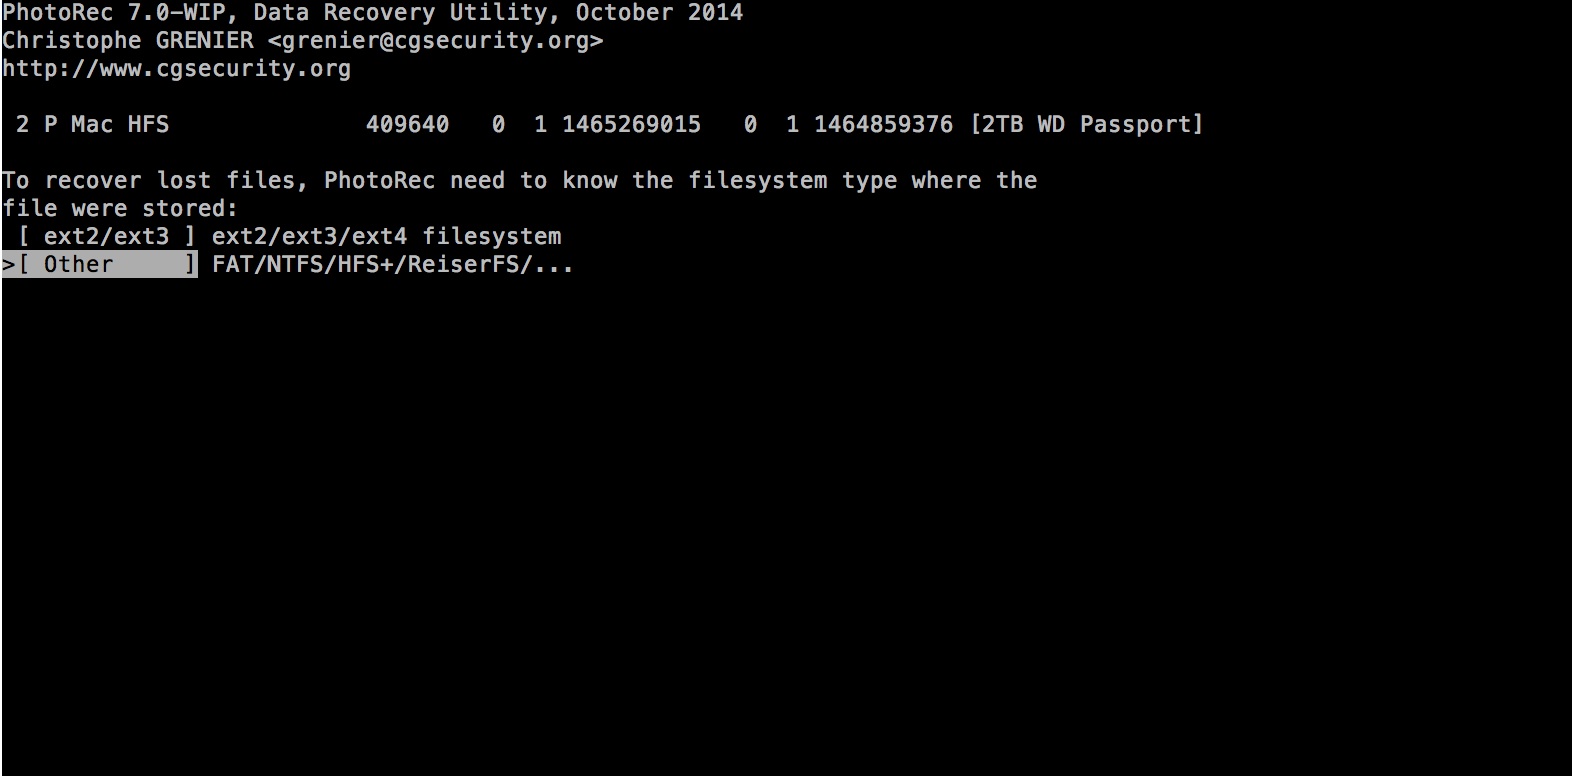
- photorec will ask you to confirm the type of file system it is searching. By default, photorec will recognize a Mac filesystem as “Other” FAT/NTFS/HFS+/ReiserFS/… Mac file systems are generally HFS+ (Hierarchical File System). Press enter / return to confirm the filesystem as “Other”.
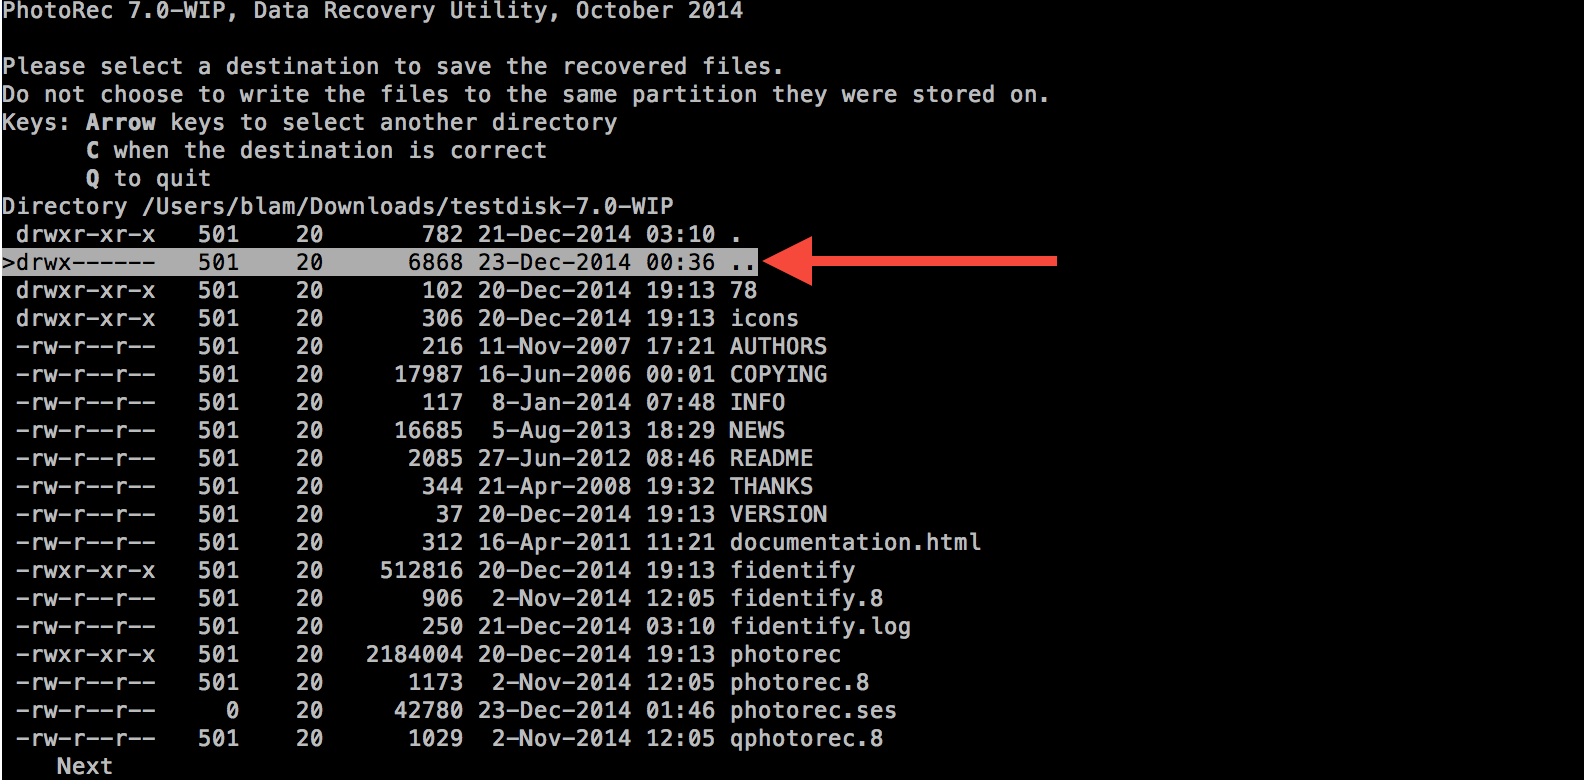
- Next, we need to choose a location to put the recovered files that are undeleted. photorec starts by showing you the directory where the undelete program itself is running from (next image visible below). By default this would normally be /Users/[your user name]/Downloads/testdisk-7.0-WIP. Pressing “C” key chooses the current directory as the place to save recovered files. A new sub-directory will be created for your recovered files to be stored within named recup_dir.1. Your recovered files will be inside of recup_dir.1. If you run photorec multiple times, recovering files multiple times, you’ll have a recup_dir.X directory (where “X” is a number) created for each time you recovered files through photo.
-
To choose another directory to save recovered/undeleted files, use your up/down arrow keys to select “..” (two periods) which when you press enter / return you will move you one directory level up to /Users/[your user name]/Downloads/. You can continue to select “..” to travel further up the directory hierarchy structure, or you can choose a directory at the level you are currently at.
-
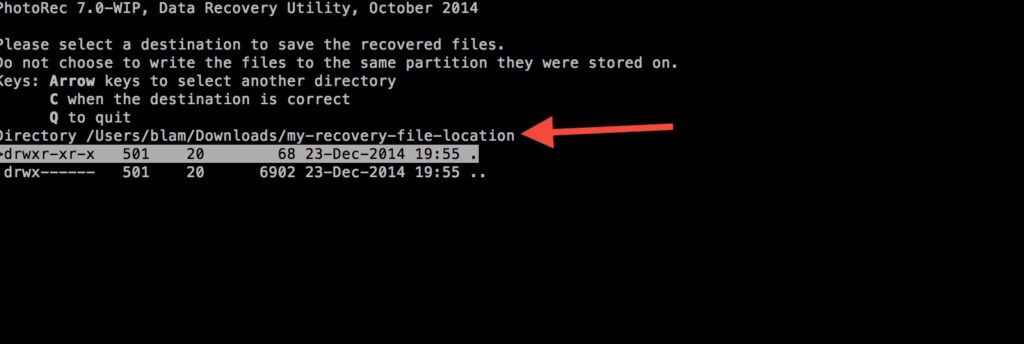
To select a directory to save your recovered files under, you need to actually enter that directory before pressing “C” button which chooses a location for saving files into. Simply moving the highlight to a directory and pressing “C” will choose the current directory you are within, not the directory you see highlighted! This may be confusing. You must be inside the directory you want to save files to. In the below image I’ve chosen and entered “/Users/[your user directory]/Downloads/my-recovery-file-location” as the place to save recovered files.
- Do not select a directory that is on the disk partition that you are recovering files from! In order for deleted files to be recovered, they must not be overwritten by other data. Saving recovered files to the disk where you accidentally deleted files and are trying to recover, will likely make it impossible to recover some or most of your files. Be careful! I used a separate external disk to 1) ensure I wasn’t overwriting my deleted files permanently and 2) because I needed more space to save recovered files than my main disk had free.
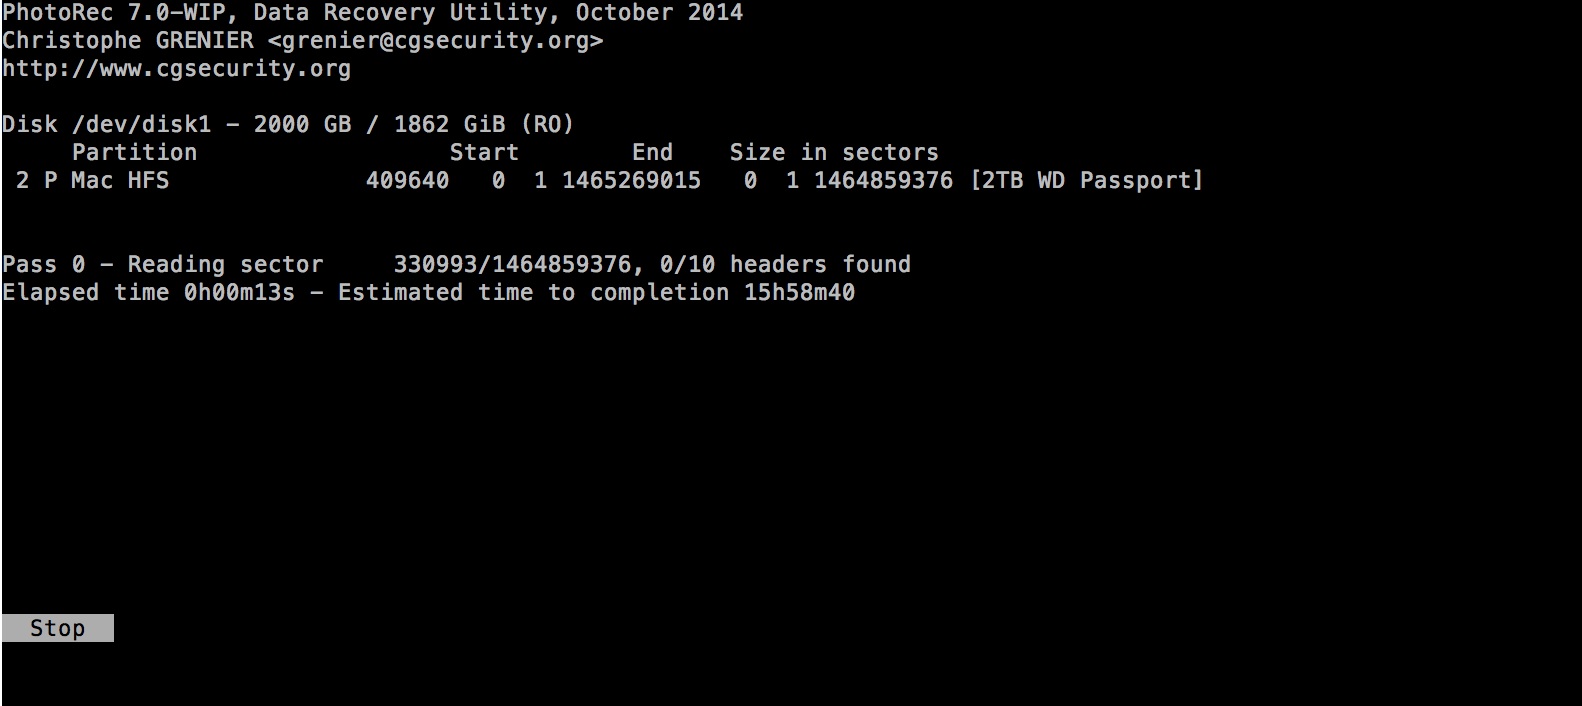
- The search for deleted files on the selected partition will start. photorec will display how many files are found of each file type you selected. In this example, mov file types (which includes MP4’s that I wanted to recover and undelete in my case) are being recovered and undeleted.
-
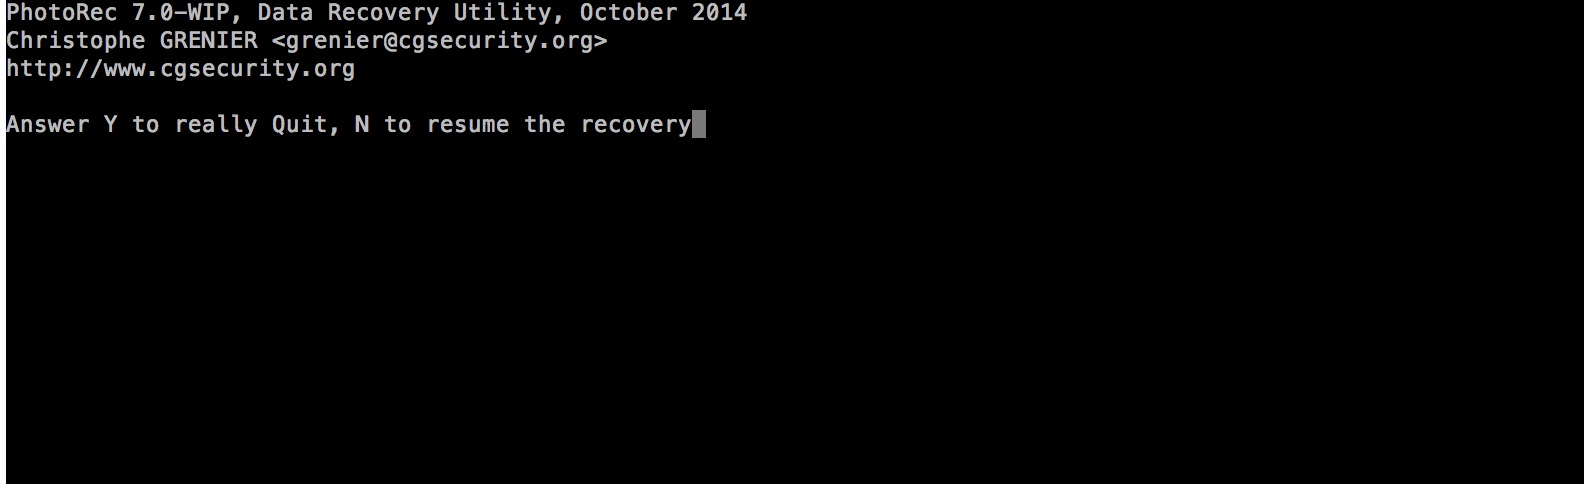
To pause the search / recovery procedure, press “enter / return” which stops the recovery process. You’ll be asked whether you really want to quit or resume the recovery procedure.
- photorec will now step through your disk partition, sector by sector, looking for deleted files of the type you have chosen. Hopefully files will start appearing in your chosen recovery location. The recovered files will not have the same filename as before they were deleted, but will have the correct file extension. For example, JPEG image files could be named something like f389401384.jpg. (I believe the filename has some relation to the sector of the disk partition where the file was found, but I’m just guessing). File search and recovery time for a 1TB drive running at 7200RPM on a USB3 connection was about 2.5 hours in my case. This time will vary depending on your computer speed, disk size, disk speed, disk format and connection type. Keep in mind I didn’t use the rdisk method of accessing my disk, so recovery time could have been much shorter.


To recap, Photorec is a Mac OS X file undelete program that is completely free of charge. If you’ve moved files to Trash and then emptied the Trash, Photorec is the only truly free program on Mac OS X to undelete your files. It requires the use of Mac’s built-in Terminal program.
Let me know if you have any questions (ben -at- installing cats.com) or suggestions about using Photorec.